Unleash Your Creativity with a Dinosaur Cake
Dinosaur cakes are a beloved choice for themed parties, especially for kids. Whether celebrating a birthday or another special occasion, these cakes offer a fun and exciting centerpiece that captures everyone’s imagination. This guide will take you through all the steps to create a jaw-dropping dinosaur-themed cake that is both delicious and visually stunning.
Choosing the Perfect Dinosaur Cake Design
The design of your cake sets the tone for your creation. Here are some popular options:
- 3D Sculpted Dinosaurs: Bring the prehistoric creatures to life by sculpting a cake into a T-Rex or Stegosaurus.
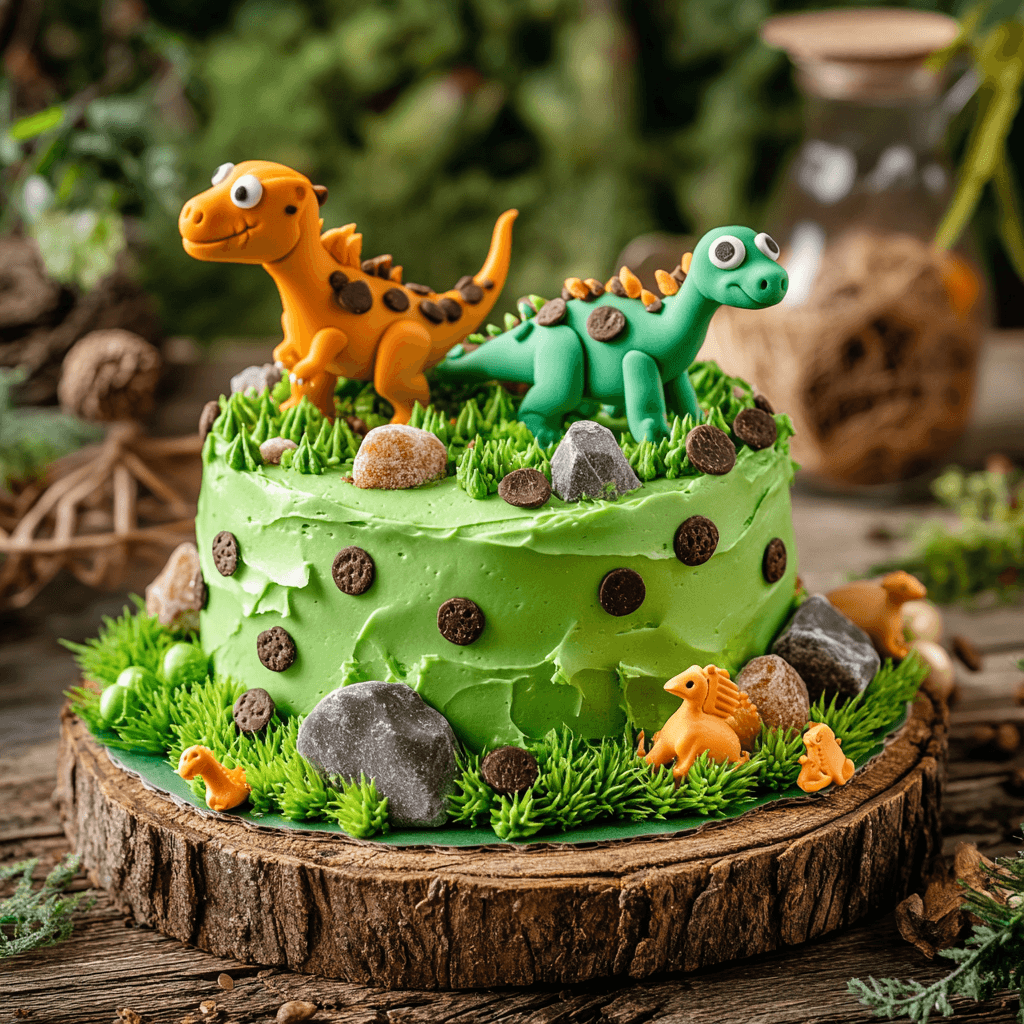
- Prehistoric Landscapes: Decorate a flat cake with edible trees, rocks, and fondant dinosaurs to create a vibrant prehistoric scene.
- Simple Toppers: Enhance a classic round or sheet cake with fondant or toy dinosaur figures for a quick yet effective design.
For inspiration on classic cake designs, explore our Vintage Cake Recipe – A Timeless Baking Tradition.

Ingredients:
For the cake:
- 2 1/2 cups all-purpose flour
- 2 1/2 teaspoons baking powder
- 1/2 teaspoon salt
- 1 cup unsalted butter, softened
- 2 cups granulated sugar
- 4 large eggs, room temperature
- 2 teaspoons vanilla extract
- 1 cup whole milk, room temperature
- Green food coloring (or your preferred dinosaur color)
The frosting:
- 1 cup unsalted butter, softened
- 4 cups powdered sugar, sifted
- 2 teaspoons vanilla extract
- 3-4 tablespoons heavy cream or milk
- Green food coloring
The decoration:
- Chocolate chips or candy for dinosaur spots
- Candy eyes or small edible pearls
- Mini toy dinosaurs or edible fondant dinosaurs
Directions:
- Preheat the oven: Set your oven to 350°F (175°C). Grease and flour two 8-inch round cake pans or line them with parchment paper.
- Mix dry ingredients: In a medium bowl, whisk together the flour, baking powder, and salt.
- Cream butter and sugar: In a large mixing bowl, beat the butter and sugar until light and fluffy, about 3 minutes. Add eggs one at a time, beating well after each addition. Stir in the vanilla extract.
- Combine wet and dry ingredients: Gradually add the dry ingredients to the butter mixture, alternating with milk, beginning and ending with the dry ingredients. Mix until just combined.
- Add the color: Mix in green food coloring until the batter reaches your desired dinosaur color.
- Bake the cake: Divide the batter evenly between the prepared pans. Bake for 25-30 minutes, or until a toothpick inserted in the center comes out clean. Cool completely on wire racks.
- Make the frosting: Beat the butter until creamy. Gradually add the powdered sugar, vanilla, and heavy cream. Add green food coloring and mix until smooth.
- Assemble the cake: Stack the cooled cake layers with frosting in between. Spread a thin crumb coat over the entire cake and refrigerate for 20 minutes. Apply the final layer of frosting.
- Decorate: Use chocolate chips or candy to create dinosaur spots. Add candy eyes or edible pearls for eyes. For a playful touch, place mini toy dinosaurs or fondant dinosaurs on top and around the cake.
- Serve and roar: Your dinosaur-themed cake is ready to make a big splash at the party!
Baking Your Cake Base
A great dinosaur cake starts with a well-baked base. Follow these essential steps:
- Choose a Flavor: Popular flavors include chocolate, vanilla, or red velvet—pick what your audience loves most.
- Prepare the Batter: Ensure a smooth, lump-free batter for even baking.
- Select the Right Pan: Use specialty pans for intricate shapes or carve a round cake into the desired form.
- Bake and Cool: Follow the recipe’s temperature guidelines and let the cake cool completely before decorating to avoid melting your frosting.
Understanding cake sizes and servings can be helpful; refer to our 8 Inch Cake Guide: Recipes, Servings, and Decorating Tips for more information.
Shaping and Assembling Your Cake
For an impressive 3D design, take these steps:
- Carve with Precision: Sculpt the desired dinosaur shape using a sharp knife.
- Layer for Dimension: Stack cake layers with frosting to add height and depth to your design.
- Stabilize the Structure: Use dowels or supports to maintain stability, especially for larger cakes.
Decorating Techniques for Your Dinosaur Cake
Bring your cake to life with these decorating methods:
- Fondant: Ideal for creating smooth surfaces and intricate details like dinosaur scales or facial features.
- Buttercream: Perfect for textured effects, such as grassy landscapes or rocky terrain.
- Edible Accents: Use crushed cookies for dirt or candy rocks to enhance the prehistoric feel.
For additional creative decorating ideas, explore our Bento Cake Guide: Flavors, Recipes, and Decorating Ideas.
Adding Dinosaur-Themed Elements
Elevate your cake with these creative touches:
- Dinosaur Figurines: Add toy or edible dinosaurs for an interactive effect.
- Dinosaur Eggs: Shape fondant or chocolate into eggs to create a realistic touch.
- Footprints and Tracks: Pipe contrasting icing to add dinosaur footprints or trails across the cake.
Final Touches for a Show-Stopping Cake
Give your dinosaur cake the perfect finishing touches:
- Personalized Messages: Use icing or fondant letters to add a name or birthday message.
- Edible Glitter or Sprays: Apply a light shimmer for a magical touch.
- Decorative Base Board: Present your cake on a themed board that complements your design.
Conclusion
A dinosaur cake is more than just dessert—it’s a centerpiece that delights and amazes. By following this guide and adding your creative flair, you can craft a cake that’s as delicious as it is memorable.
Nutritional Information:
⏰ Prep Time | 30 minutes | 🔥 Baking Time | 30 minutes | ⏳ Total Time | 1 hour
⚡ 350 calories per slice | 🍽️ Serves 12
Bon appétit and have a roaring party! 🎂🦖✨

1 thought on “Dinosaur Cake: Tips, Ideas, and Recipes”